
DJI Fly App Guide: Complete Run Down (Mavic Mini)
Now Compatible With DJI Mavic Air 2 and DJI Mini 2.
What is DJI Fly?
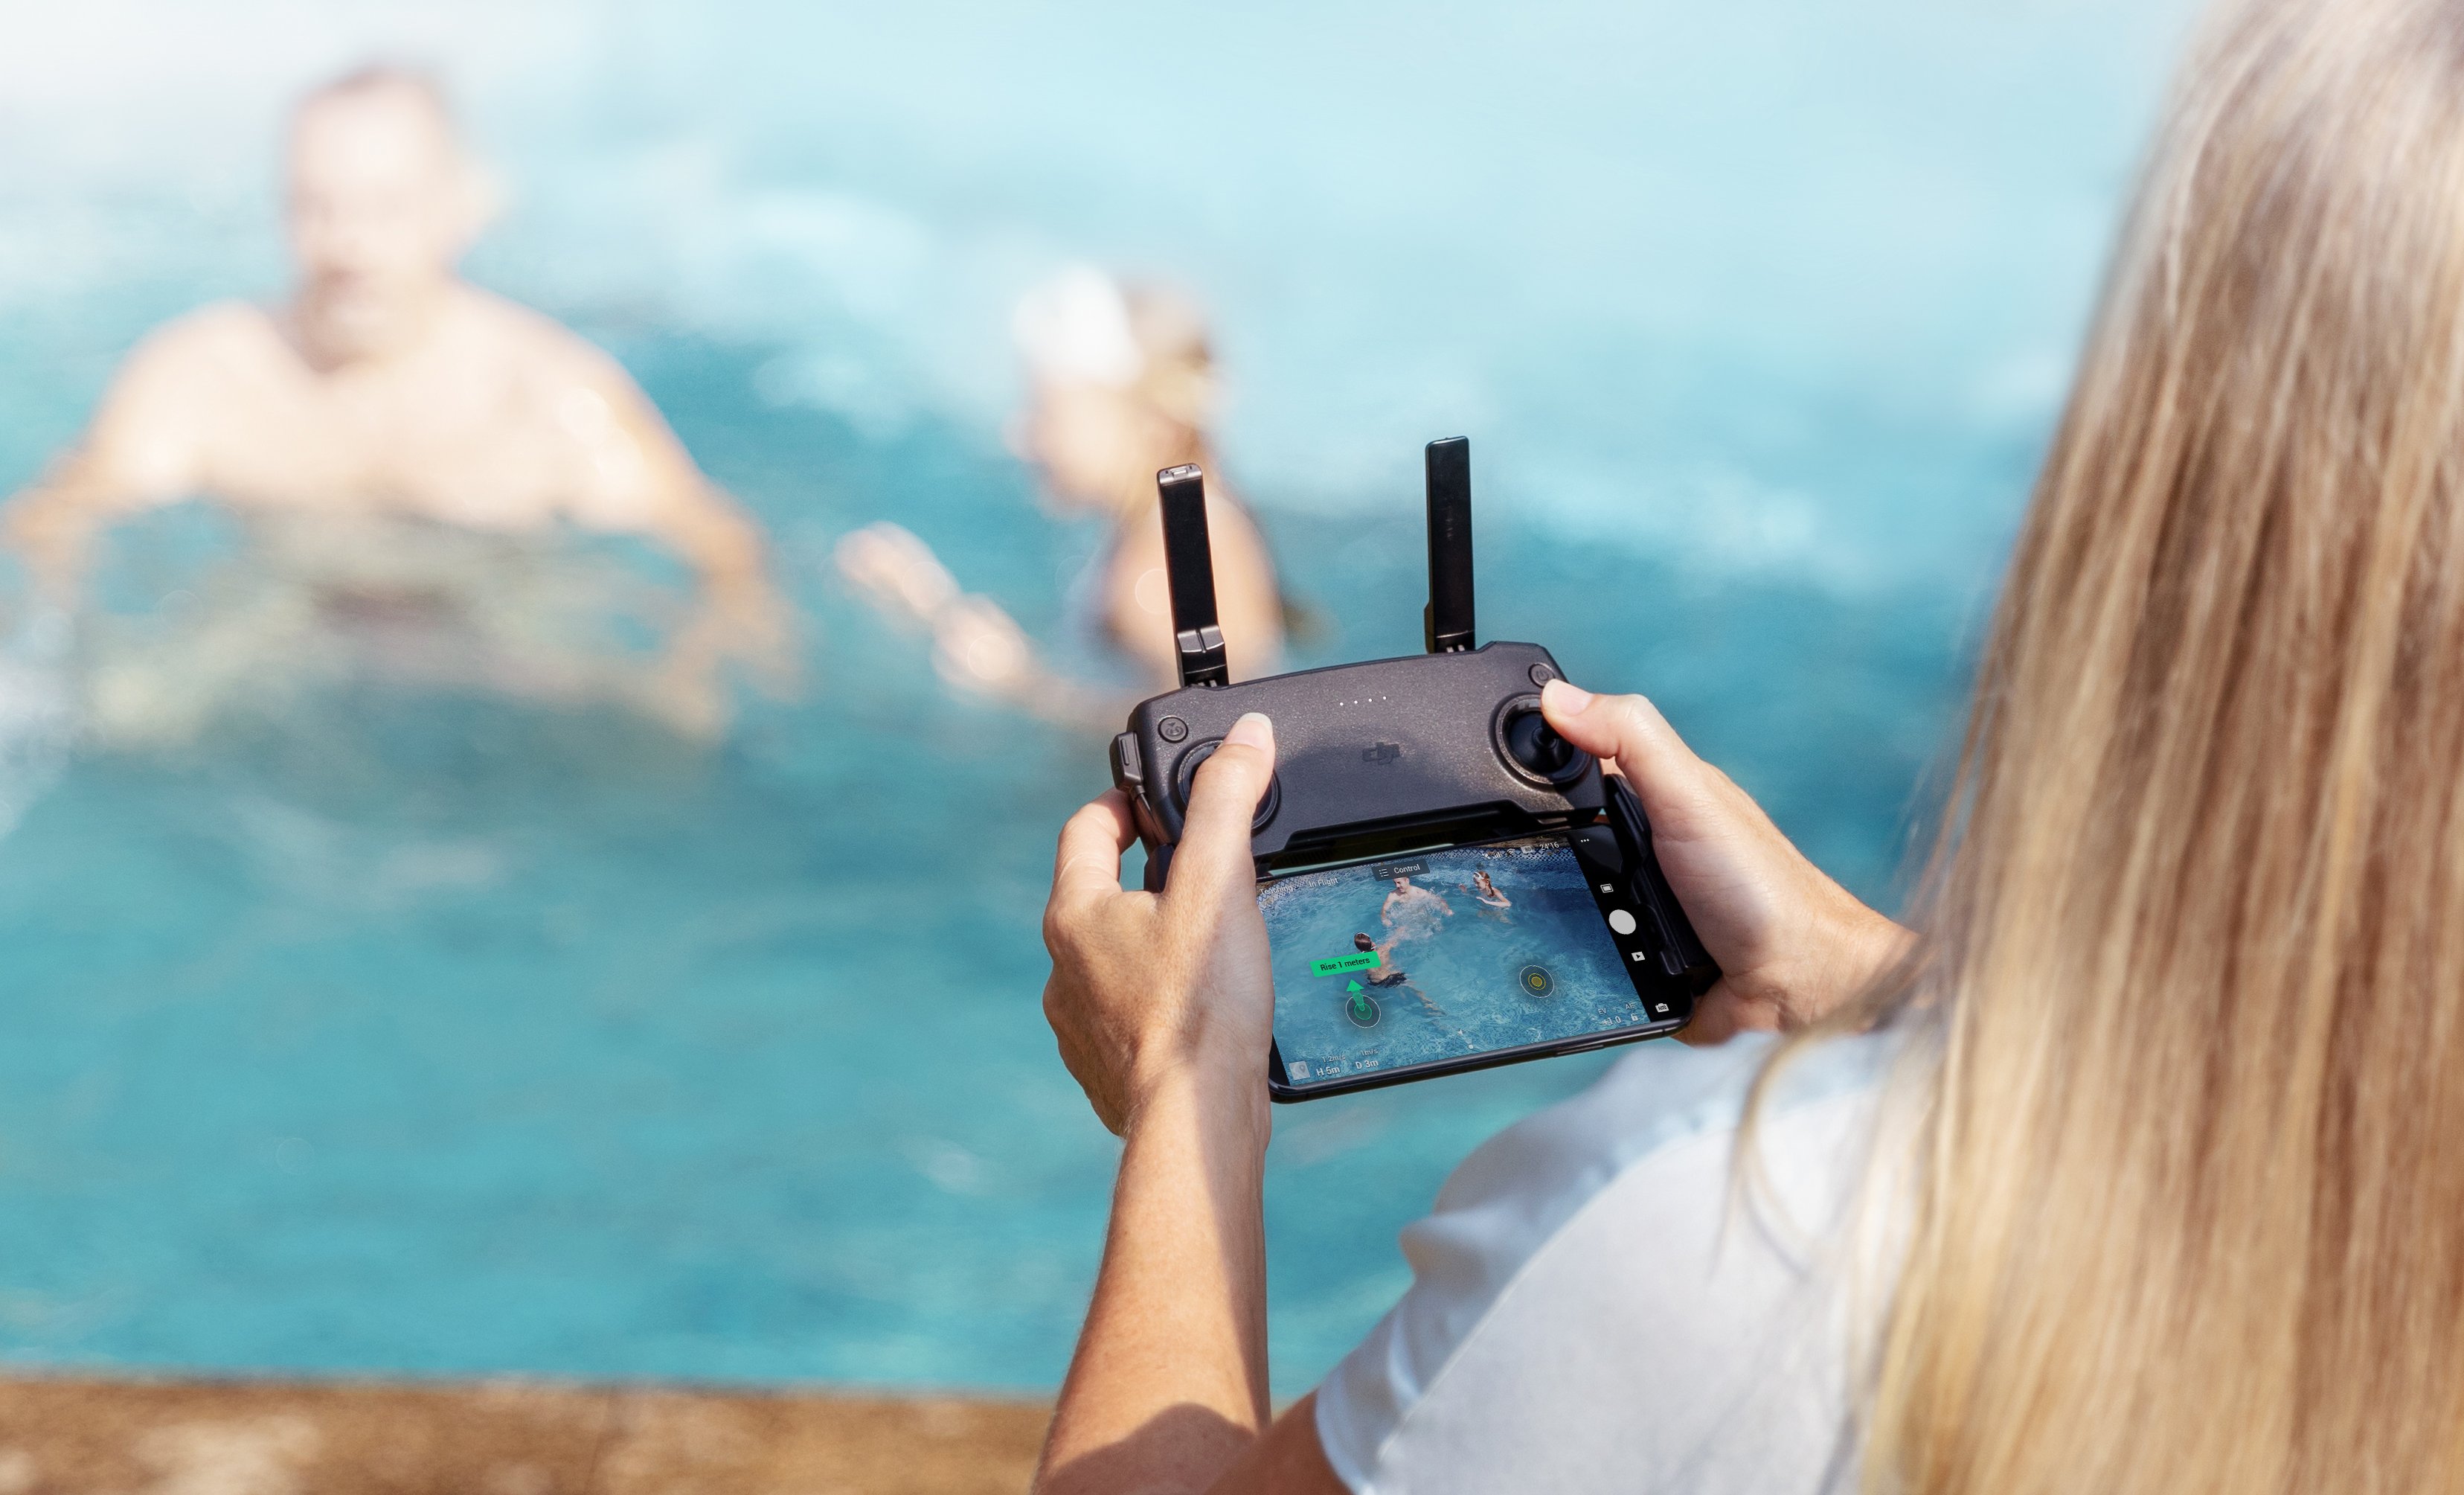
DJI Fly is DJI's brand new drone application that provides you with all the necessary tools to capture stunning images and videos for you to instantly share with your friends and family. This newly redesigned application has intuitive UI controls, in-built flight tutorials and an array of editing tools that are perfect for new drone enthusiasts, everyday flyers and content creators. If you are a seasoned photographer, you will be glad to hear about the manual photography controls, easy active tracking and the integrated access to SkyPixel, DJI's social media platform for users to create unique content. Whether you are a new flyer or not, the DJI Mavic Mini sure contains something for everyone!
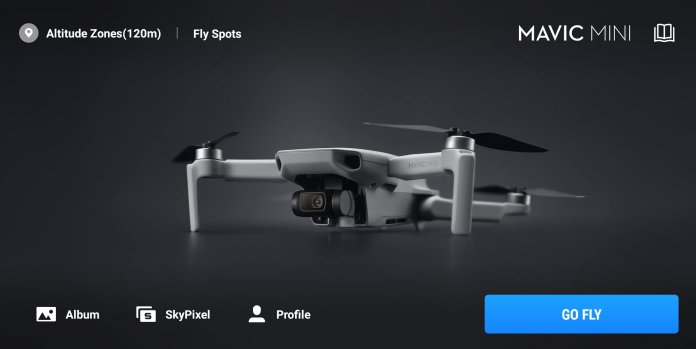
Home Screen
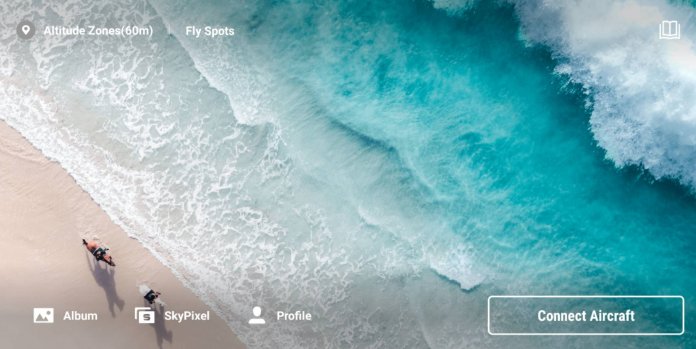
When you plug your smartphone or tablet into the controller, the DJI Fly app will automatically open. If it does not automatically open, please open the application from your smartphone or tablet. The home screen takes a minimalist and streamlined approach, making it very convenient to find exactly what you need. You will find access to your Album, Profile and the manuals (located on the top right).
Location Icon
Located on the top left hand section of your screen, you will find a location icon which brings up your current location on a map and provides some useful pieces of information. This will help you know where local runways are located (in blue). By default, it loads up in Bei Jing, you will need to wait a few seconds for the application to update to your current position. 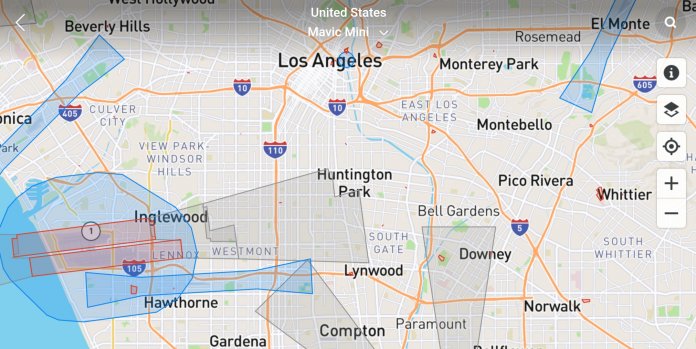
On here, you can display DJI GEO zones, which cover restricted and authorisation zones. For an in-depth look into the Australian fly zones, please refer to CASA's know your drone and their endorsed application "Open Sky".

Book Icon
Hitting the icon on the top right hand side will reveal some light reading, being the user manual, tutorials, tips and flight safety information. You can also access these manuals online and print. We recommend you to read these before your first flight to ensure you know how to use the smart features such as QuickShots.
![]()
Album, User Profile and SkyPixel Icons.
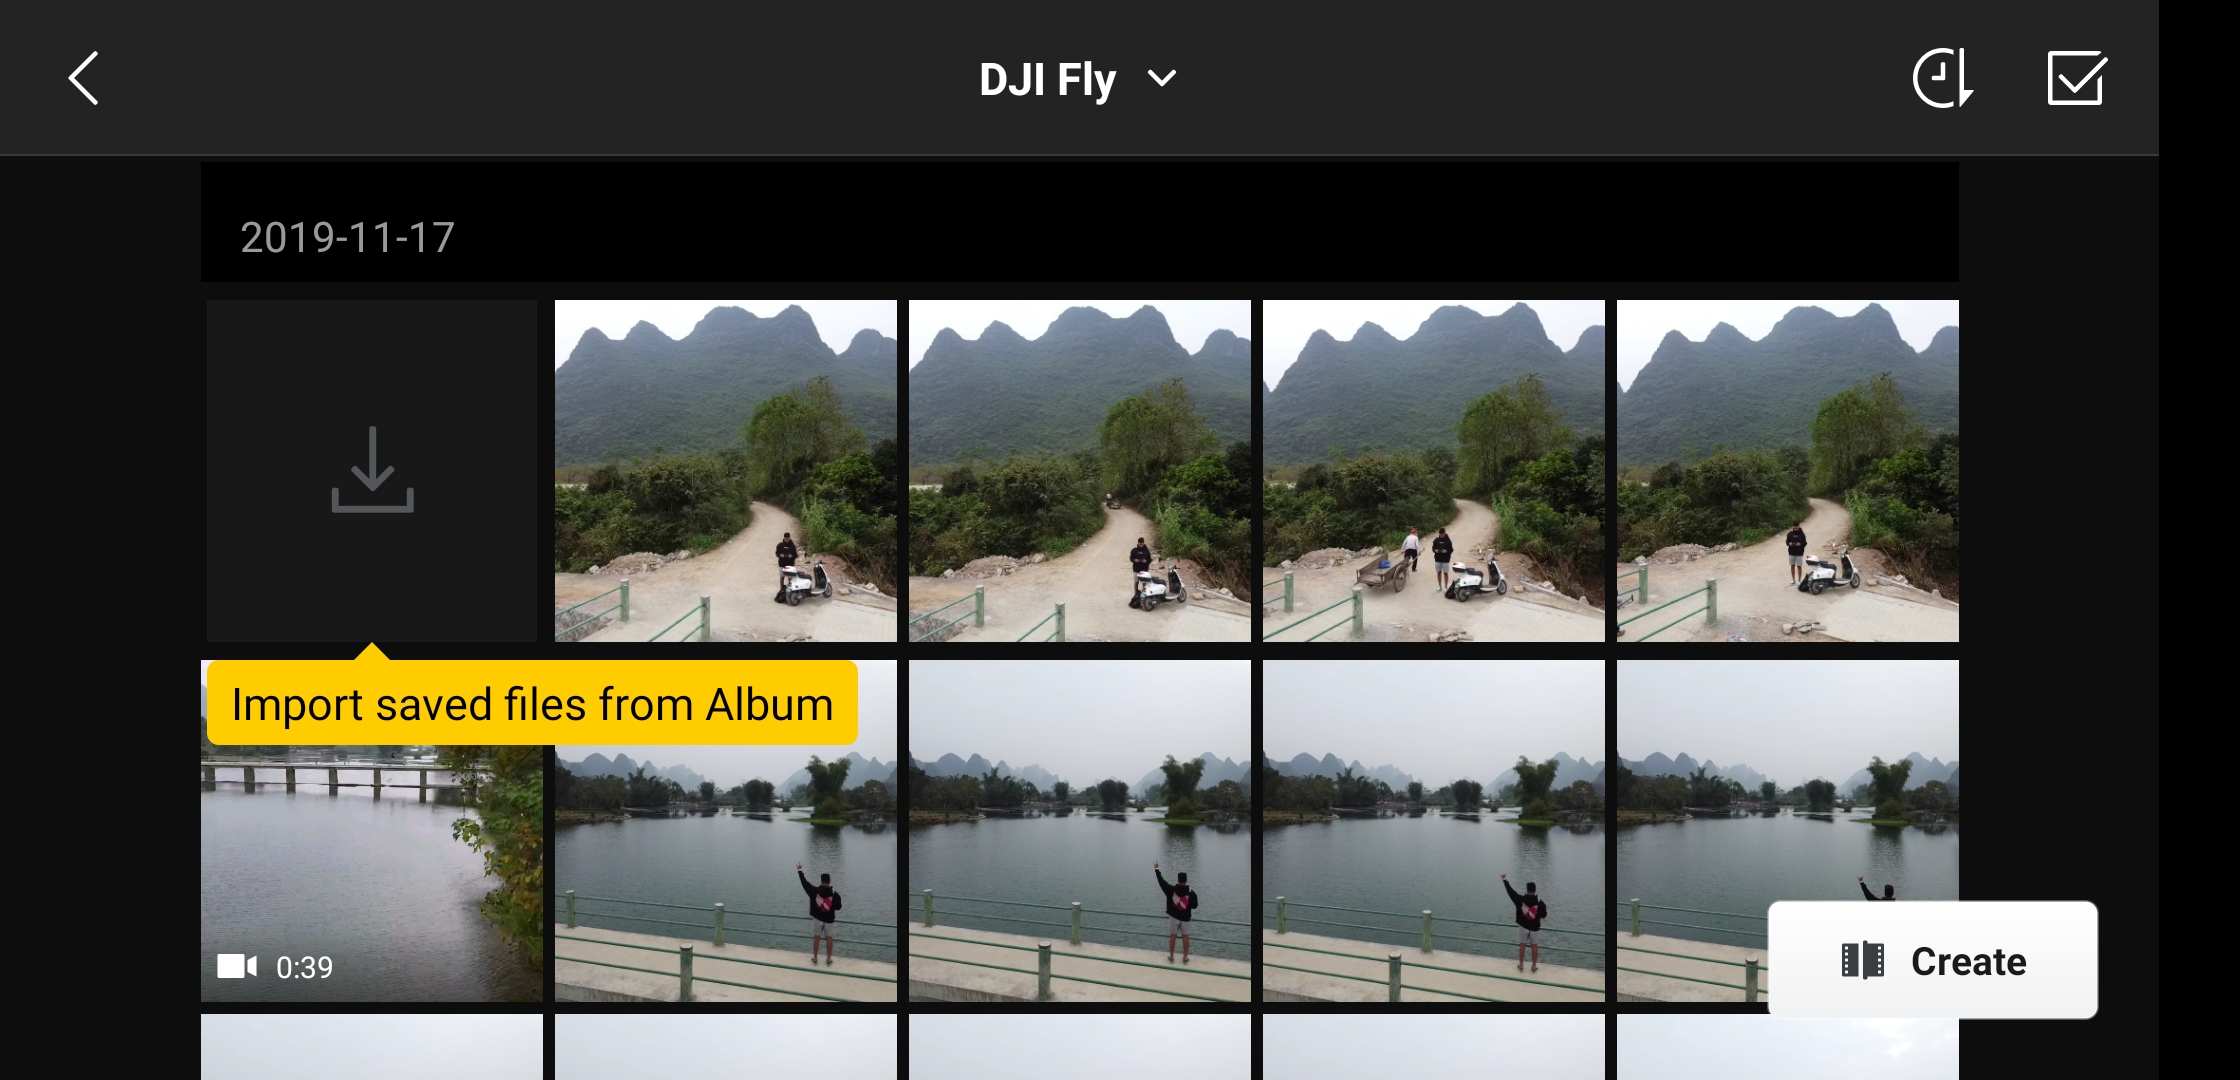
On the bottom left hand corner of the home screen, you will find several icons that will give you quick access to your album, user profile and skypixel. By tapping the album icon, you will be greeted with helpful features such as templates for creating video clips to share on social media. Simply drag your drone videos into the editor interface to make an interesting and incredible new video. Upon tapping the profile icon, you will be able to view your flight logs and the find my drone feature. The SkyPixel icon will allow you to upload your content to DJI's worldwide aerial photography community.
Go Fly Icon
Once the drone is connected, a button at the bottom left hand corner will shine blue and say "Go Fly". Upon clicking this button, you will be taken directly to your Mavic Mini/DJI Mini 2/Mavic Air 2 and enter the Camera View to fly your aircraft. If the Go Fly icon does not appear, it may mean your drone is not connected or is connecting to your controller. If nothing happens, you will need to make sure your phone is connected properly to the remote (If you have a USB-C phone, try clearing the dust/fluff in the port).
Camera View
This Camera View has everything you need to have a safe, fun flight experience from when you take off to when you land. Here you will gain access to all the features you need and the camera feed is live streamed at low latency (from your drone). Please bear in mind the transmission range may be affected by the surrounding environment. If the image is all black but your device can still takes photos and images, your phone CPU or RAM may be maxed out. In this instance you will need to close your background apps or upgrade your phone.
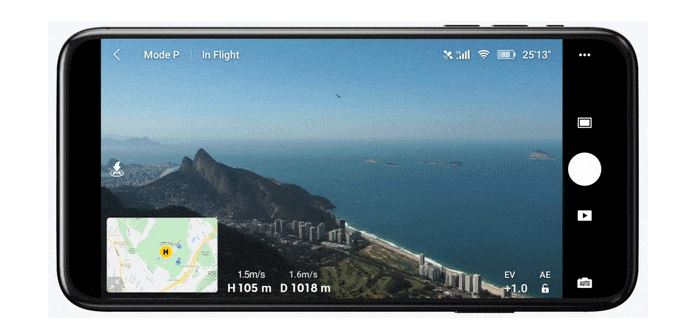
Flight Status
Check important flight status parameters such as the GPS signal, battery level, photo and video options, gimbal settings and the distance to the aircraft's home point via easy to read indicators and icons. With the recent updates, some of the top icons have been rearranged that accommodates the sensors that are found with the DJI Mavic Air 2.
Flight Modes
In the camera view, it will allow you to set one of three unique flight modes for your Mavic Mini; these being Position, Sport or CineSmooth mode.
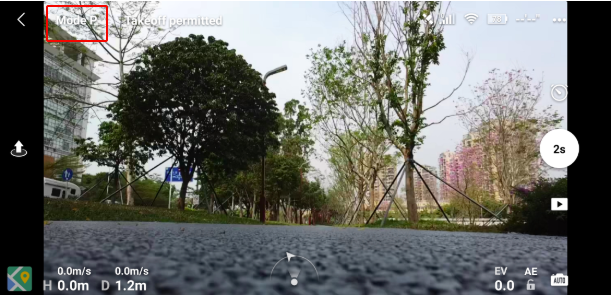
Position
Position mode is the default flight mode for your Mavic Mini. In this mode, the aircraft will have access to the essential functions which include GPS the downward facing vision sensors.
Sport
Sport mode was designed to allow you, the user, to fly your aircraft at maximum speed and manoeuvrability. Due to the increased speed, the Mavic Mini/Mini 2 and Mavic Air 2 will have a limited function, therefore you cannot access quick-shots in this mode. This mode is great for traveling quickly to points of interest as well as having fun! Do make sure you only use this mode in a safe, open area to experience just how fast this drone can fly!
When flying the Mavic Air 2 in sport mode, please note the obstacle sensors on the drone are turned off. Therefore if you are flying towards an obstacle, the drone will not slow down and will continue its path. We strongly suggest not to use sport mode until you are more comfortable with the drone.
CineSmooth
This is THE mode to be in to get the mode cinematic and stunning footage. The drones rotational movement is slowed down with the control sensitivity being increased. This will ensure your shot will be the smoothest and most stable.
On the Mavic Air 2 and the Mini 2, you can adjust these modes on the controller with the flick of a switch, which makes it significantly more convenient.
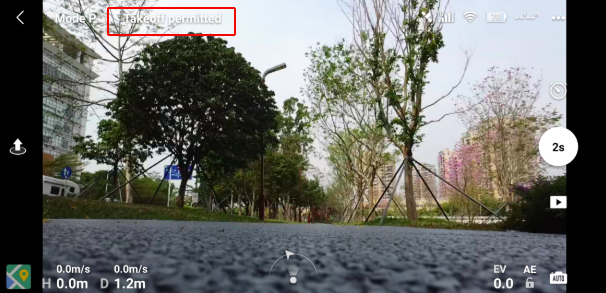
Aircraft Status
On the top left hand corner of the camera view, there will be a status bar where you can see the current status of the drone.
Tap this status indicator to view and set your max altitude, flight distance and return to home altitude. You can also check your aircraft's remaining storage space and format your SD card.
RTH Altitude
The RTH altitude is very important to ensure your aircraft will fly at a safe and stable altitude when it returns to its home point. Before you set the return to home altitude, we recommend looking around at your surroundings to see what may be the highest obstacle and set the drone to return higher (around 10m) than that obstacle. By default, the drone is set to return to home at an altitude of 30m. You can set the height anywhere between 20m and 120m.
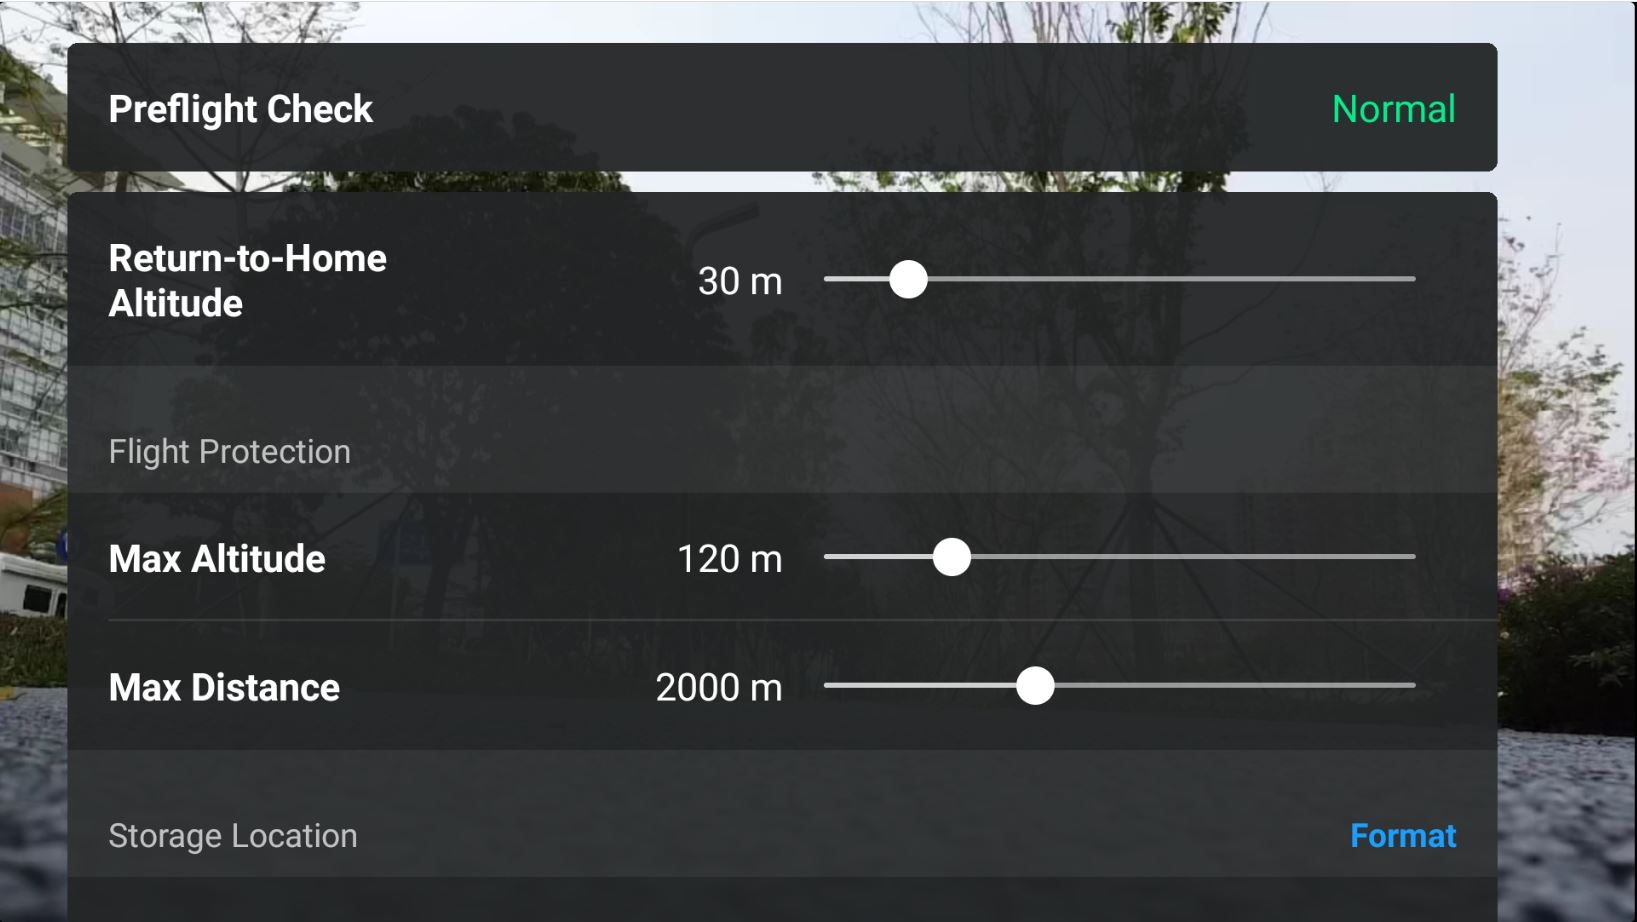
Max Altitude
Here you will find the Max Altitude for the Mavic Mini/Mini 2 and Mavic Air 2 to be set at 120m by default, however you can change this manually. The max altitude is capped at 30m during beginner mode or when you are not logged into the DJI Fly application. You will also find that once you have the propeller guards on the Mini drone, your altitude will be adjusted as the additional weight affects the flight performance.
Max Distance
The maximum distance determines how far your aircraft can fly from the remote controller. Make sure to set a safe distance that will allow your aircraft enough time to return to home before the battery runs out! This is especially helpful if you have a friend of family member using the drone and you want to make sure it does not go beyond a certain distance.
SD Card
Use this space to view your available storage space for photos, videos and to format your SD card. It is important to back-up your SD card before formatting your SD card.
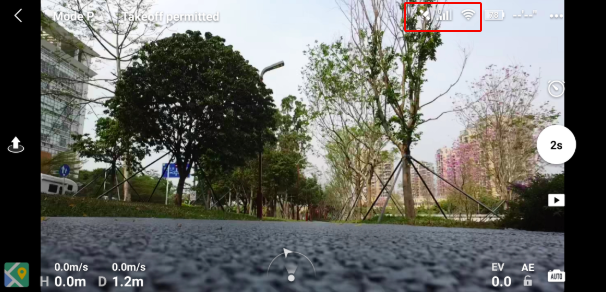
Signal Strength and GPS
There is a small satellite icon on the top right hand corner which shows how many satellites the drone is currently connected to along with the connection strength. You can use the Wi-Fi indicator in this area to also check the strength between the Mavic Mini and the remote controller. The Wi-Fi indicator's signal strength will change as you encounter interference during flight. Please always check and make sure you have a secure connection to the aircraft before you begin flying!
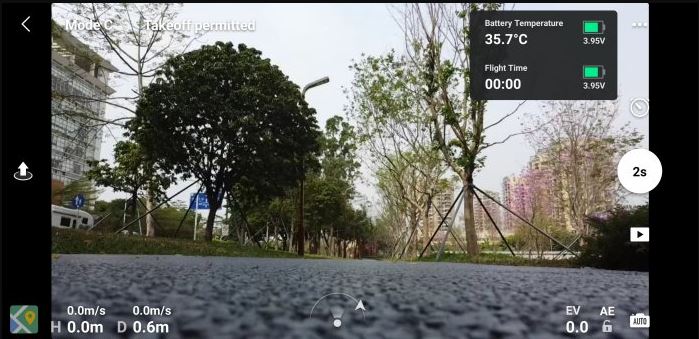
Battery
Hitting the indicator displays displays the battery life, temperature, voltage, remaining flight time and information regarding the overall health of your battery.
Camera and Video settings
With a sleeker and more efficient interface, the DJI Fly's updated user interface provides you with an extremely clear, expanded view for shooting breath-taking shots. Tasks such as adjusting camera parameters, switching between shooting modes and adjusting the gimbal angle can now be done with just one simple tap of your finger!

Photo
On the right hand side, you can switch between photo and video mode.
In photo mode, you can shoot single or timed photos and set the timer for timed shots anywhere from 2-60 seconds. Here you can also manually adjust the shutter speed from a range of 1/8000 to 4 seconds. This controls how much light and motion is captured by the camera. This makes it ideal for use with shooting tasks like capturing clouds moving across landscape, waves crashing into the seashore or busy night scenes.

Furthermore, you can also adjust the ISO filter value anywhere from a range of 100 to 3200 for help with tasks such as taking night time photos or snapping images in dark settings without using a flash. However, try not to set your ISO value too high or you may introduce a lot of noise to your footage.
Video
Here we can choose between shooting in 2.7K or 1080p resolution, as well as manually adjusting the frame rate between a range of 25-60 FPS. Whilst using the 2.7K resolution, we recommend setting a frame rate of 30 FPS for the clearest images.
Much like the photo settings, you can also go into manual mode to adjust your video parameters, which is especially helpful if you use ND filters (they block the amount of light that enters the sensor). Manual settings give you greater control over your footage and if you are unsure how to use the manual settings, we suggest taking part in our photography classes.

Quickshots
Tapping the quick shots icon will allow you to choose one of four unique, automated flight patterns for capturing stunning video recordings with your Mavic Mini.
Rocket
The aircraft will hover at a low, wide-angle viewpoint and then suddenly shoots upwards at a fast speed like a rocket lifting off into space.
Dronie
The aircraft focuses on a subject and then flies backward at an upward incline whilst filming. If you plan to shoot a landscape, this is a perfect mode.
Circle
The aircraft keeps the camera focused on the subject in the center of the frame and circle the subject at a slow constant rate and distance. This is an ideal QuickShot mode for showcasing an interesting perspective while highlighting a subject in the center of the frame.
Helix
The aircraft starts close to the subject and then flows upward in spiral like motion. As the aircraft flies higher, the loops it makes get larger and larger, giving your shot an interesting helix effect.
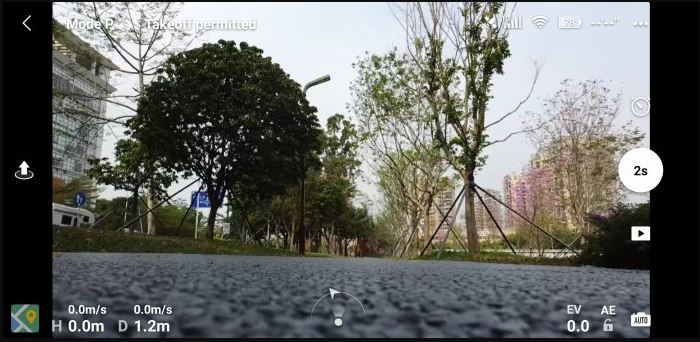
Map, Location Info and Auto Take-off
Hitting the map at the bottom corner of the camera view screen you will be able to view the location information of your aircraft and the surrounding area. This map will show GEO zones or areas with flight restrictions, ability to locate your home point and change the map overlays. The auto take off button is also located just above the map which is incredibly handy when you want to start flying without using your remote controller!

Flight Telemetry
Next to the map you will be able to find all your stats! The data here includes the current height (H), flight distance (D) along with the aircraft vertical and horizontal movement speeds.

Overflow Menu
The three dots on the top right hand corner will open up an overflow menu, which you can use to access important information such as safety, control, camera and transmission settings your Mavic Mini, and view your aircraft information.

Safety
This menu here allows you to update your home point (very important to know), reset the gimbal and aircraft connection. Setting the home point is the most important thing to do so the aircraft knows precisely where to return to if the aircraft becomes disconnected from the remote controller whilst flying.

You can also calibrate the compass and the inertial measurement unit (IMU). The IMU controls the speed and altitude of your aircraft. If your Mavic Mini seems to be drifting by a lot without you touching the sticks, calibrating the IMU may resolve this issue.
Flight Protection
Under here you can set important safety parameter such as max flight distance and speed.
Update Home Point
Here you can update your home point to the aircraft's takeoff position or the current GPS location of your mobile device and remote controller.
Sensors
Here you will be able to adjust the sensitivity level of your aircraft to control how fast and smooth it reacts to user operations with DJI fly and the remote controller.
Advanced Safety Settings
Under this setting you will be able to enable emergency propeller stop, which allows users to stop the aircraft propellers directly in the event of an emergency.
Find My Drone
This will give you peace of mind when flying outdoors. You can enable find my drone to record your aircraft last known GPS location and emit a sound and/or a LED beacon to make it easier to find!
Control
The control menu allows you to switch between flight modes and change the gimbal mode between follow (default) and FPV. For the gimbal, follow mode provide stabilisation along all three axis for shooting smoother footage. In comparison, FPV mode unlocks movement along all three axis for a more dynamic shooting experience. You can also set whether the app and aircraft data are displayed using the imperial or metric system depending on your needs.

Adjusting the gimbal pitch speed and smoothness will allow for a more cinematic video.

If you experience any issues with the gimbal, simply go through with the gimbal calibration.
Finally, you can use this menu to set the control stick mode for your controller, being mode 1,2 or 3. Doing so changes the way your aircraft responds to the movement of the control sticks. If you are experiencing issues controlling the aircraft, you can also re-calibrate the remote controller via this menu.
Camera
Under the camera section, you can change different parameter and access more professional and advanced settings.
Resizing the images are pretty simple, you can shoot in a 4:3 ratio of a 16:9 ratio. Please note you can shoot in 4:3 to capture more of the scene and later crop down to 16:9.

Under the advanced settings, you will find the following advanced features:

Histogram
Using the histogram improves exposure for high-contrast shots, like capturing a sunset with objects in the frame.
Gridlines
Using the gridlines can help you keep your horizons straight and line your subject exactly where you want it to be.
Overexposure
Once enabled, you will see zebra strips appearing on areas with high overexposure in image previews and in camera view. Using this warning helps you know when to adjust camera settings to match the brightness of an overexposed area.
Anti-flicker
This feature helps reduce the impact of shooting in unsteady lighting, like cityscapes with bright fluorescent lights.
Cache limit
Your cache limit is based on the max storage space of your device. Be wary when using the auto setting as shooting whilst your cache is full may result in excess footage being deleted.
Transmission
Using the transmission menu to enable settings that improve communication between your aircraft and the remote controller. It is best to avoid flying your mini around obstacles such as rocks, trees and metal structures which can cause interference.
Channel Mode
Auto mode will pick the best available channel for your surrounding environment. If you want to set your transmission frequency manually, note that low frequencies are more favorable for long-range flights, but the video will decrease on the live feed. Using higher frequencies is more optimal when flying at closer distances.

About
Here is a menu that contains your aircraft information, including the current aircraft firmware, DJI fly firmware and the Fly Safe Database versions. You can also view detailed information such as the name and model of your aircraft, check for available updates, view battery information and check other important and check other important serial numbers and information.

If you are looking to purchase a drone, our D1 Team will help you pick the right drone at the right price.
